# SE1EP5 - Android Native
# References
- Bahasa Pemrograman (opens new window)
- Retrofit (opens new window)
- Picasso (opens new window)
- Jenis Layout di Android (opens new window)
# Android Basic
# - Pemrograman Java pada platform Android
Seperti yang sudah kamu tahu, bahwa Java adalah bahasa program yang mendukung banyak platform, Mulai dari desktop, web hingga mobile. Salah satu platform mobile yang populer adalah Android yang sepenuhnya mendukung bahasa program Java sebagai bahasa utamanya.
Meskipun sekarang banyak developer yang mulai beralih ke Kotlin, masih banyak library android yang dibangun menggunakan bahasa program Java.
Ada beberapa bahasa dan text format yang harus kamu kuasai dalam pembangunan project Android dengan Java, diantaranya:
- Java
- XML
- JSON
- SQL
Ada beberapa kemiripan antara project yang dibangun untuk Android dan Web, yaitu:
| Platform | Logic | UI |
|---|---|---|
| Android | Java | XML |
| Web | JavaScript | HTML |
Jika untuk program java basic kamu bisa membuat project tanpa IDE, kali ini untuk membuat project android kamu diharuskan menggunakan IDE. Beberapa IDE yang bisa kamu gunakan yaitu:
- Android Studio
- Intellij IDEA
Berhubung pada materi sebelumnya kamu sudah memiliki Intellij IDEA, kali ini kamu cukup menggunakan Intellij IDEA untuk membuat project Android.
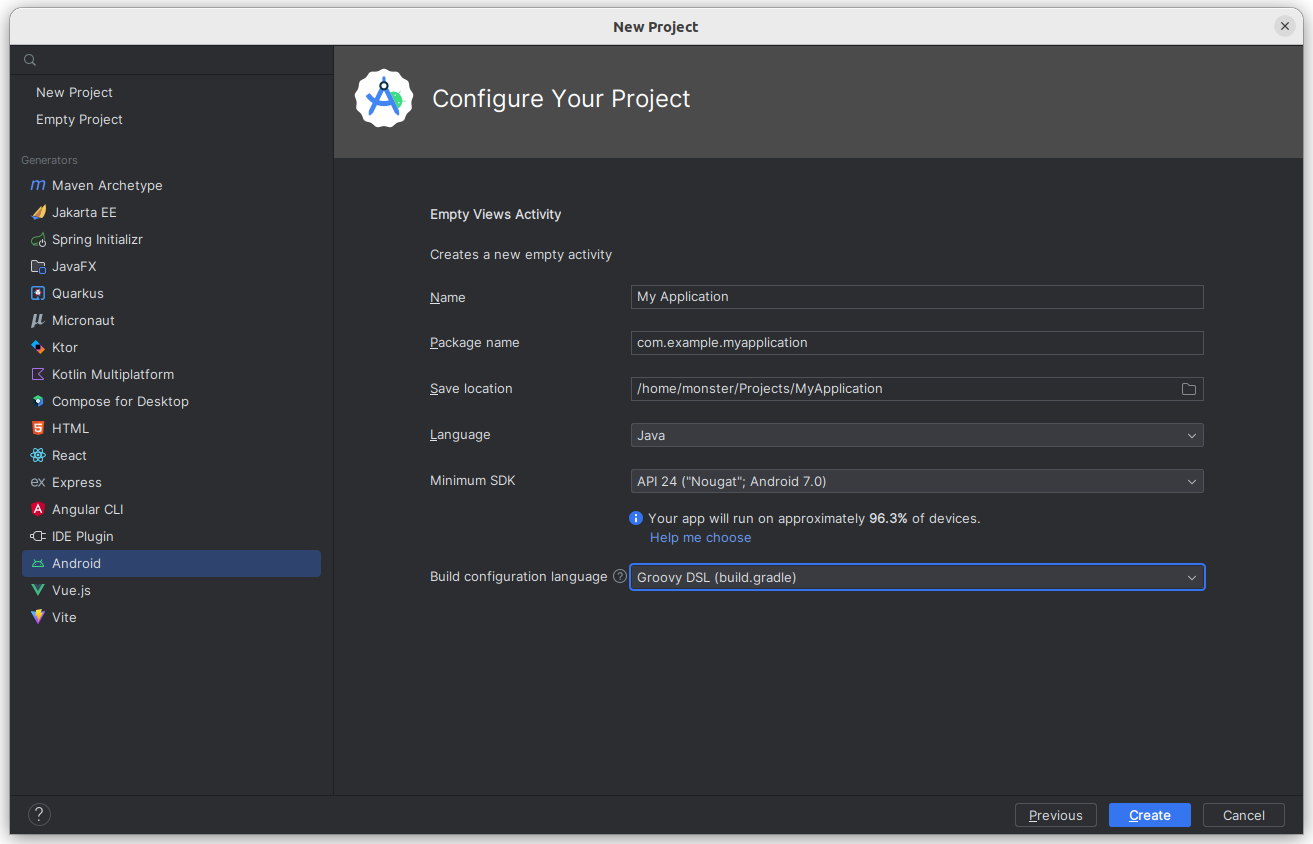
# - Membuat Android Project
Berikut ini adalah langkah-langkah pembuatan Android Project pada Intellij IDEA.
Buka Intellij IDEA:
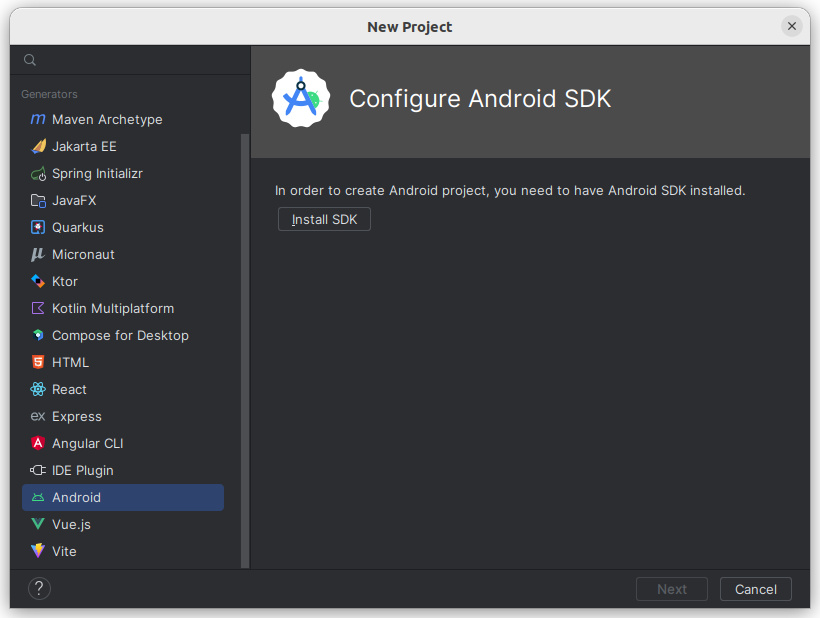
- click New Project
- pilih Android
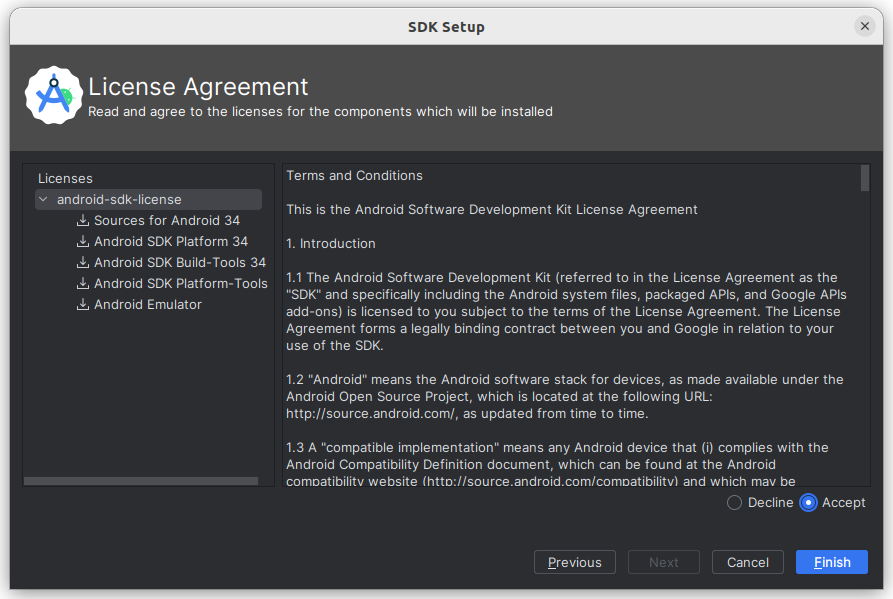
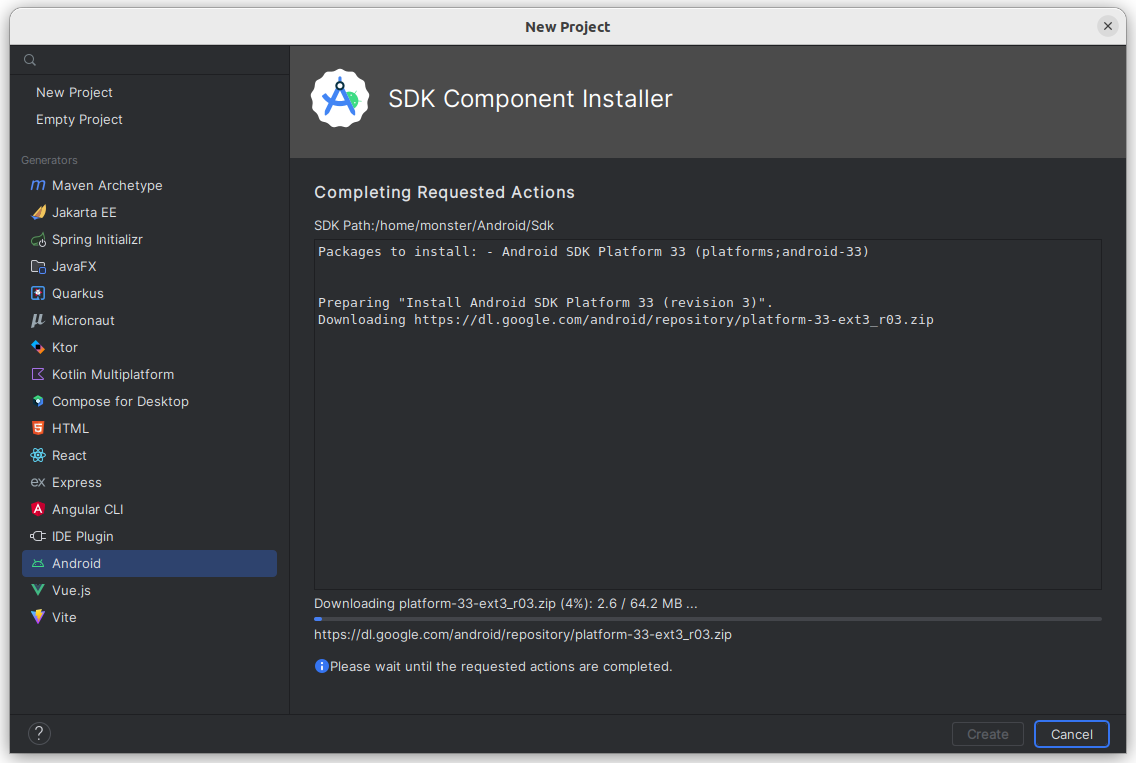
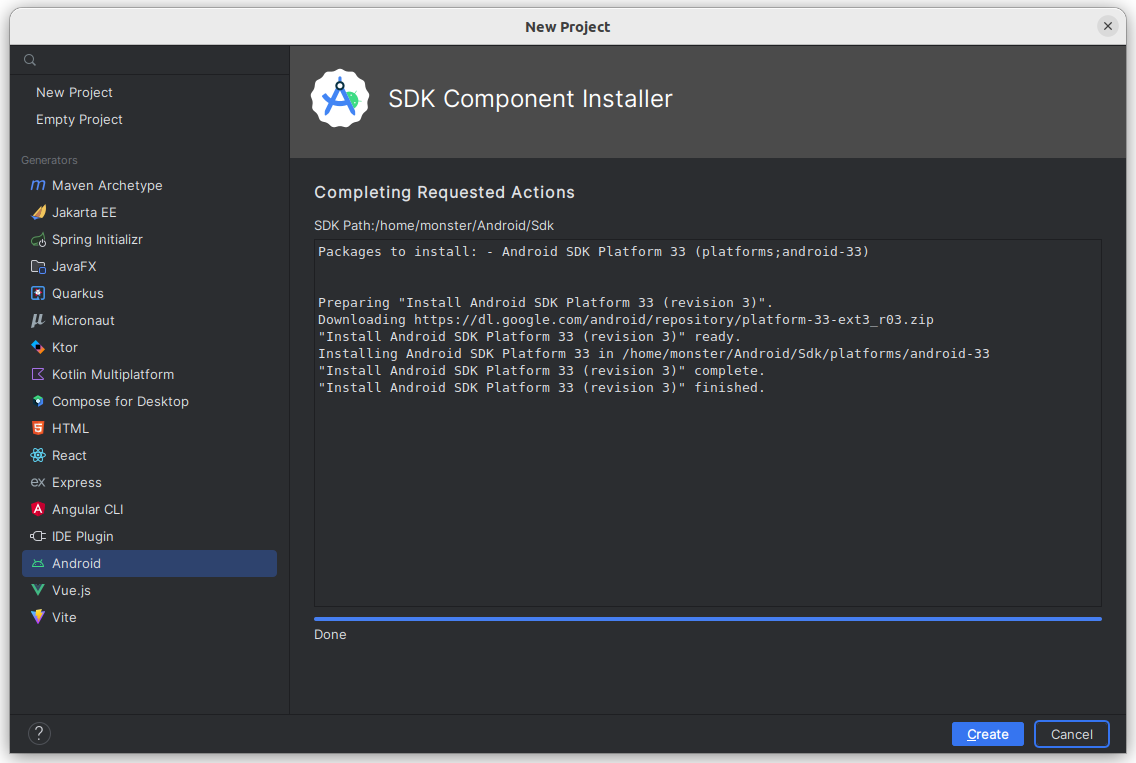
- pilih Install SDK (Langkah ini hanya untuk pertama kali setup)
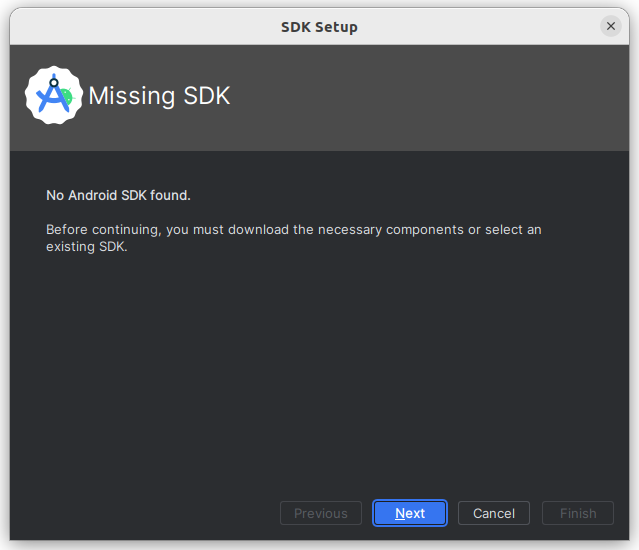
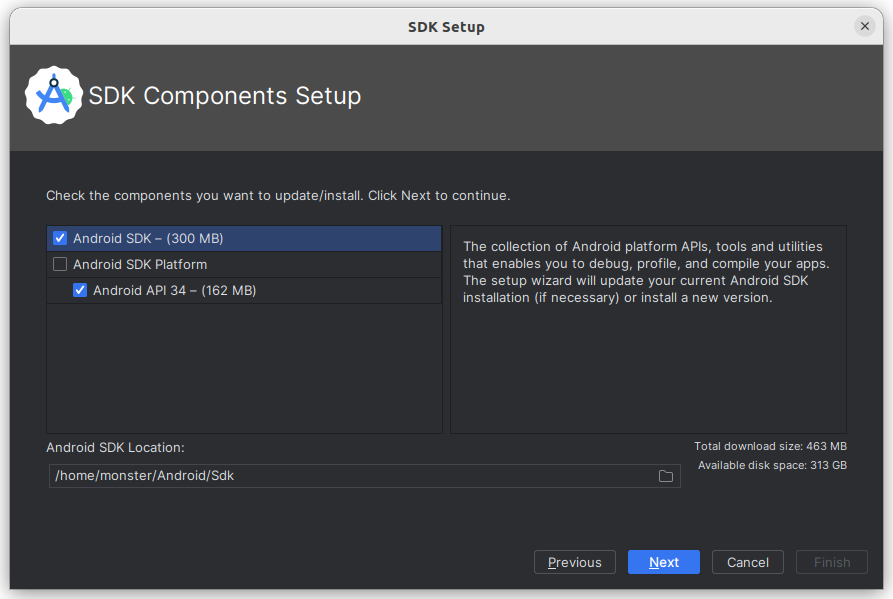
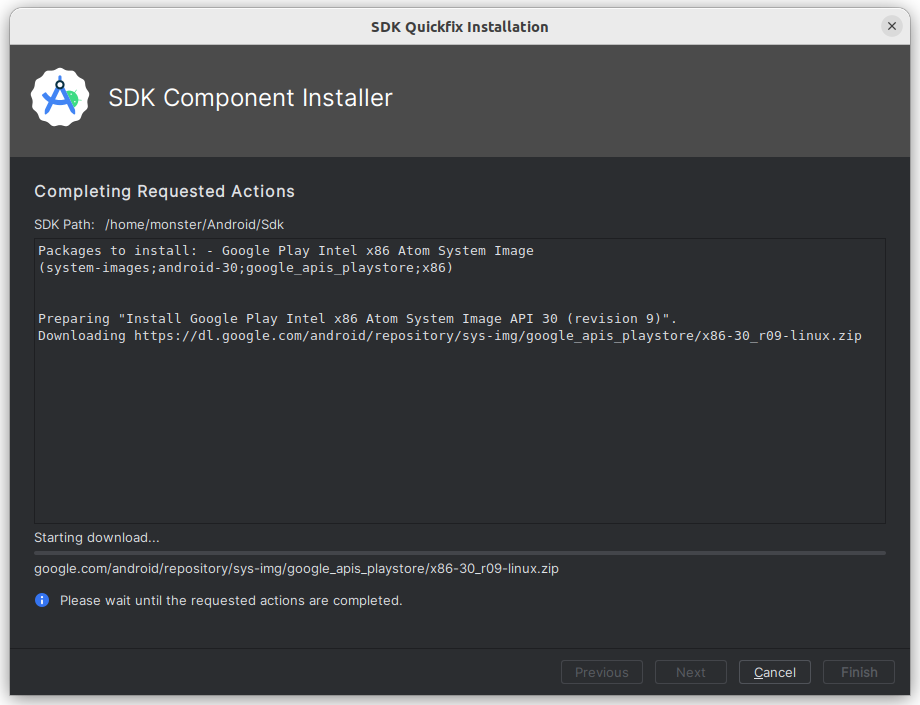
Intellij IDEA, akan melakukan pengecekan apakah kamu sudah pernah menginstall Android SDK atau belum. Jika belum maka Intellij IDEA akan mendownloadnya untuk kamu:
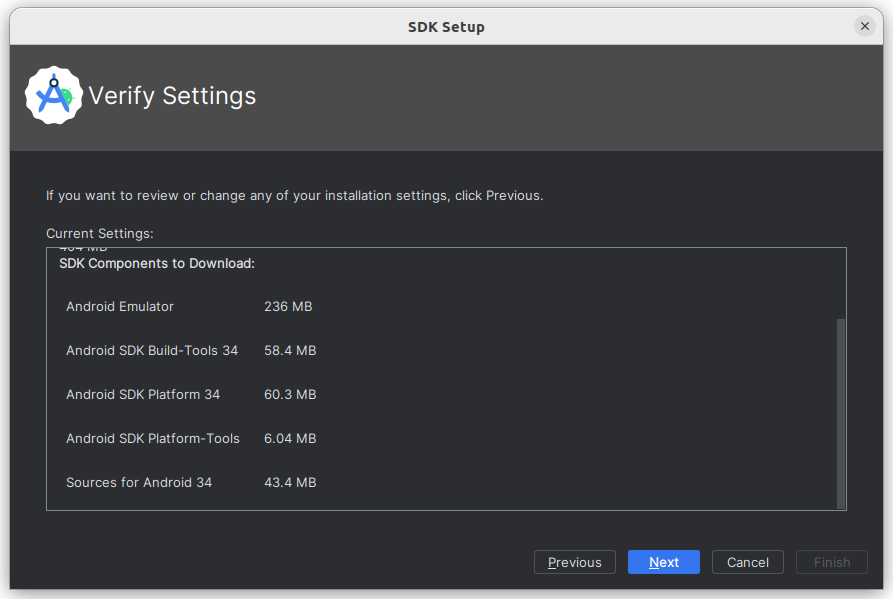
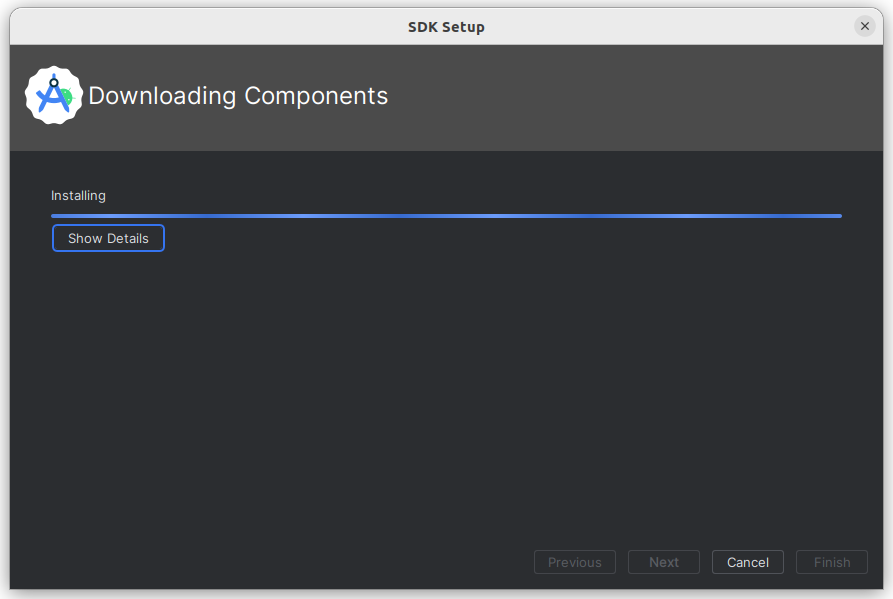
Tunggu sampai proses download selesai:
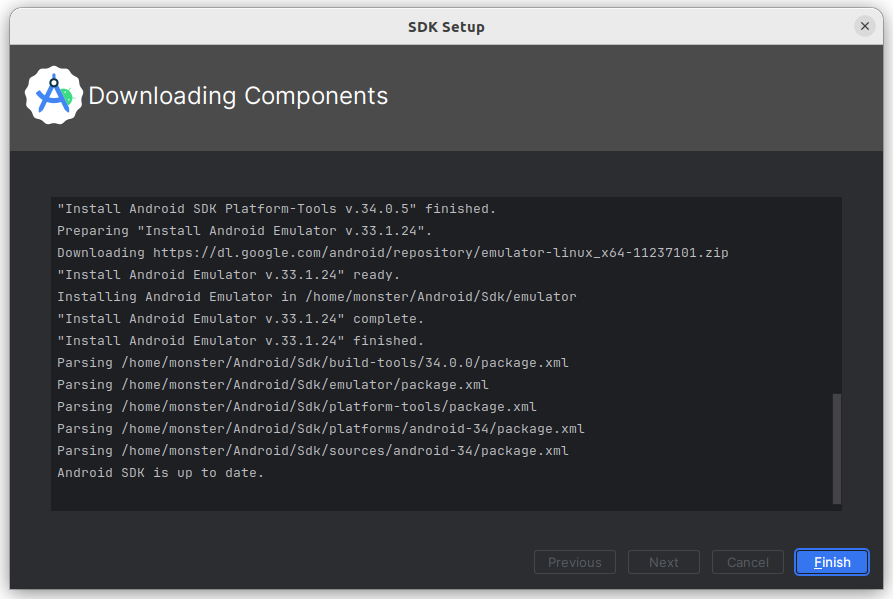
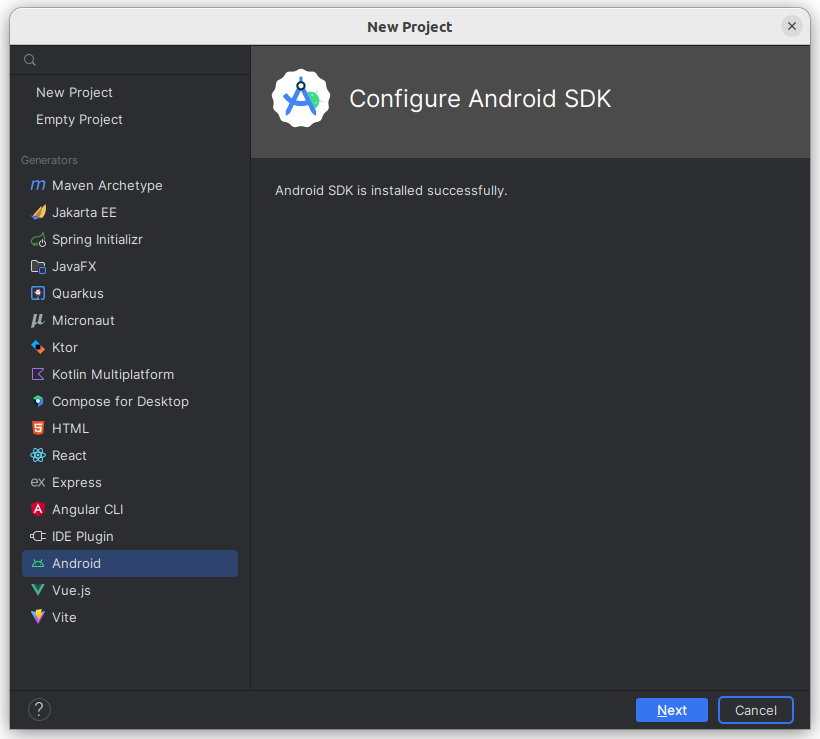
Setelah selesai maka kamu sudah siap membuat Android project:
Pilih template Empty Views Activity:
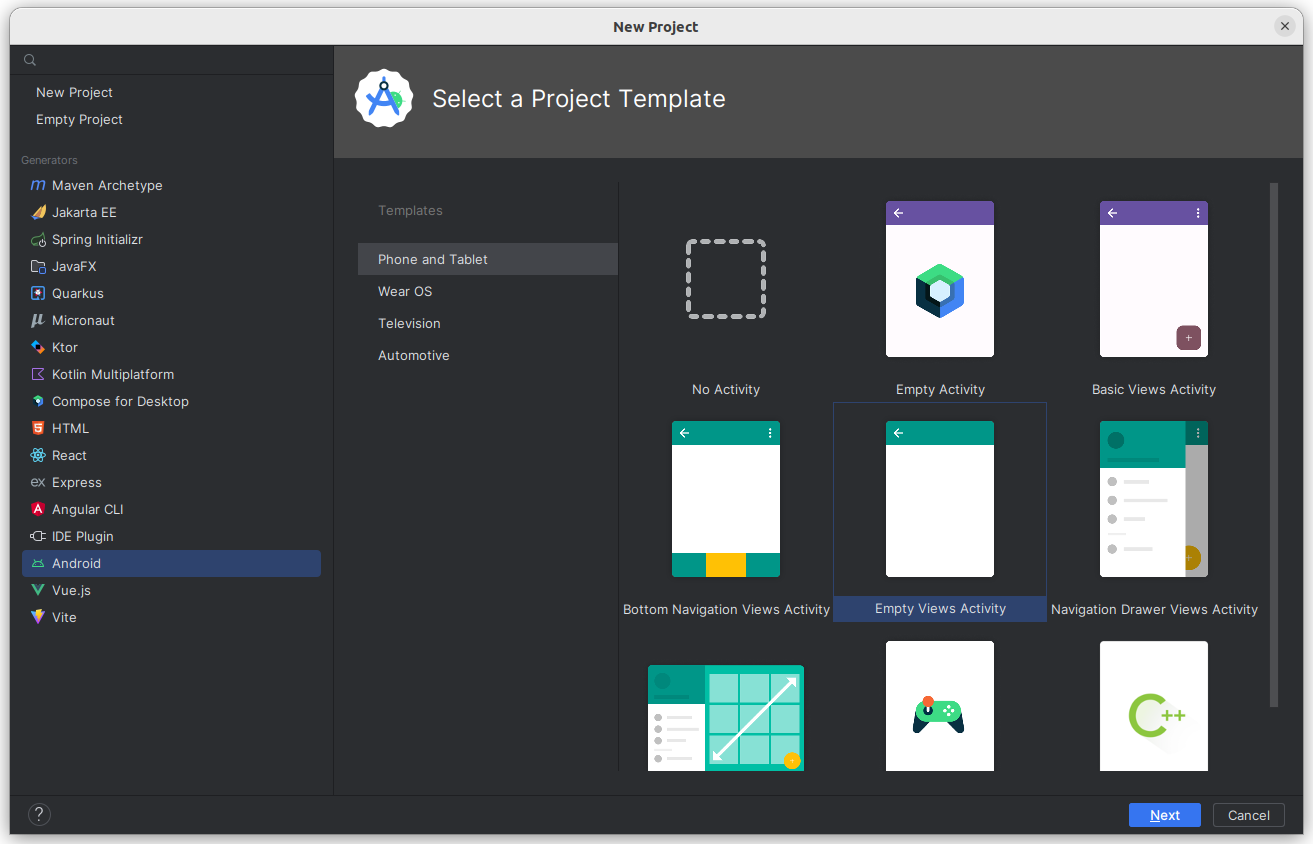
Isi form dengan ketentuan sebagai berikut:
- Masukan Nama Project yang akan menjadi nama Aplikasi kamu di Android Smartphone
- Masukan nama package
- Pilih folder sebagai lokasi penyimpanan project
- Pilih Language Java
- Pilih Api Level (Semakin besar persentasenya maka semakin banyak kompatibilitasnya)
- Pilih Groovy sebagai build configuration language
- Kemudian click Create
Tunggu sampai proses inisialisasi selesai:
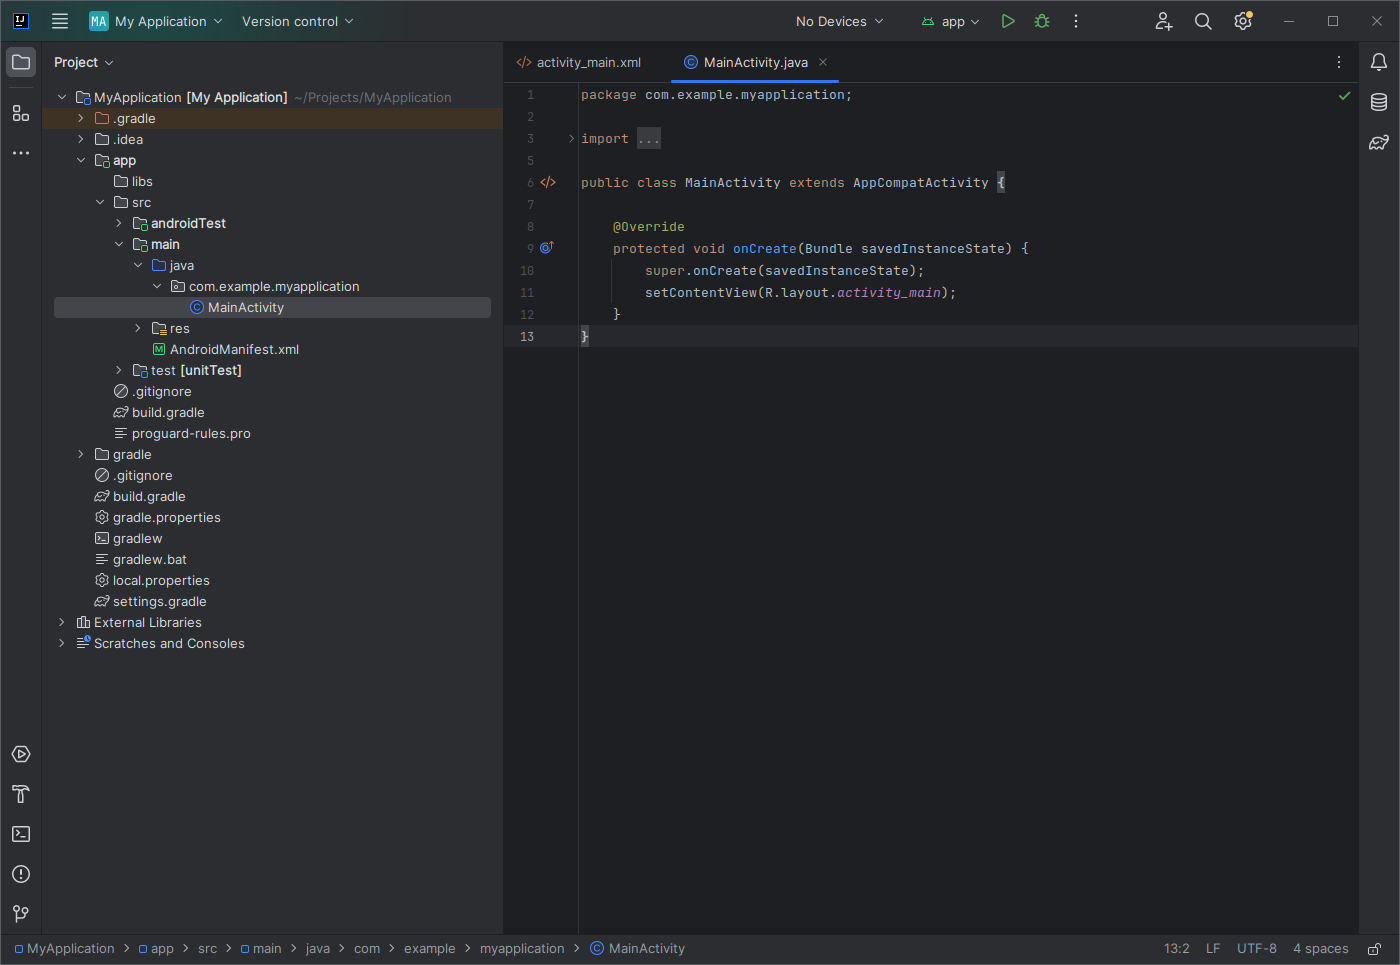
Setelah project selesai diinisialisasi, maka kamu sudah bisa menjalankan project tersebut.
Ada beberapa cara yang dapat kamu gunakan untuk menjalankan project:
- Menggunakan perangkat fisik (direkomendasikan)
- Menggunakan perangkat virtual (akan memakan resource yang cukup besar)
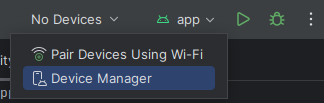
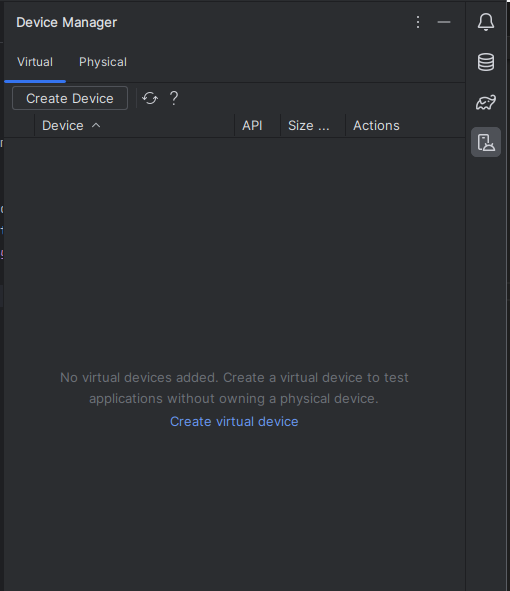
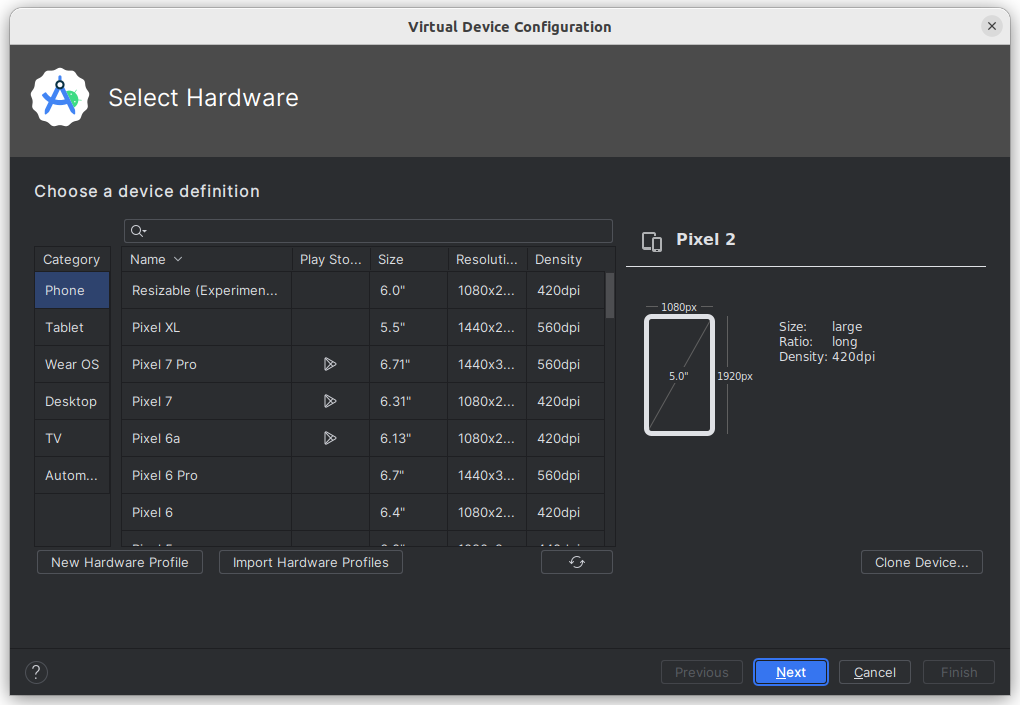
Dari kedua cara tersebut kamu harus mendaftarkan perangkat kedalam Intellij IDEA.
Menambahkan physical device pada Intellij IDEA:


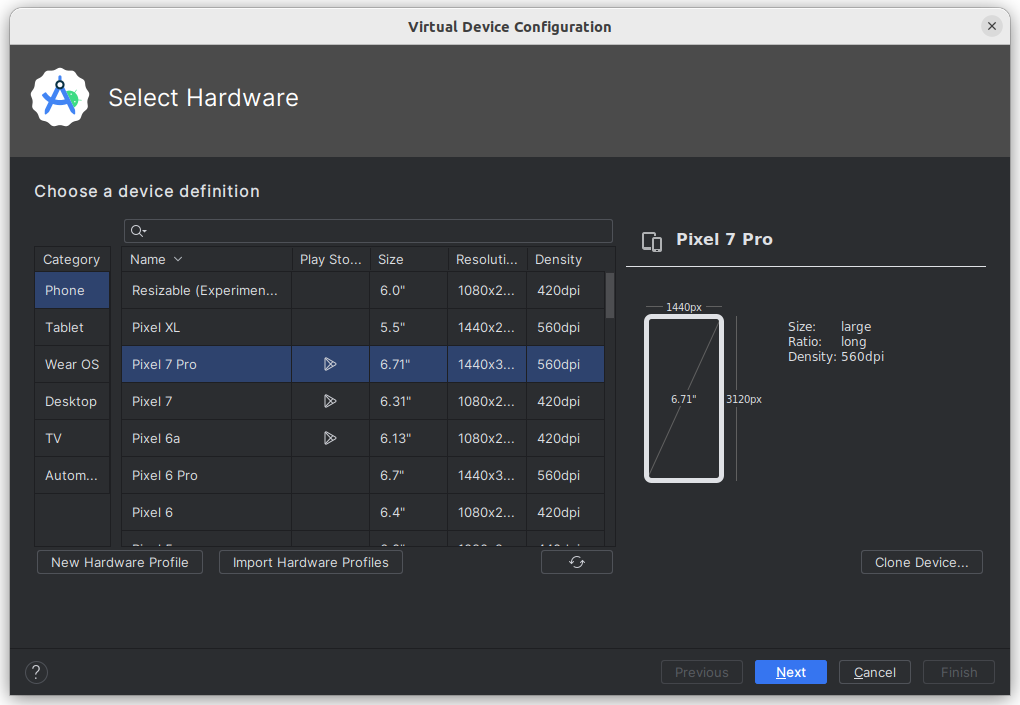
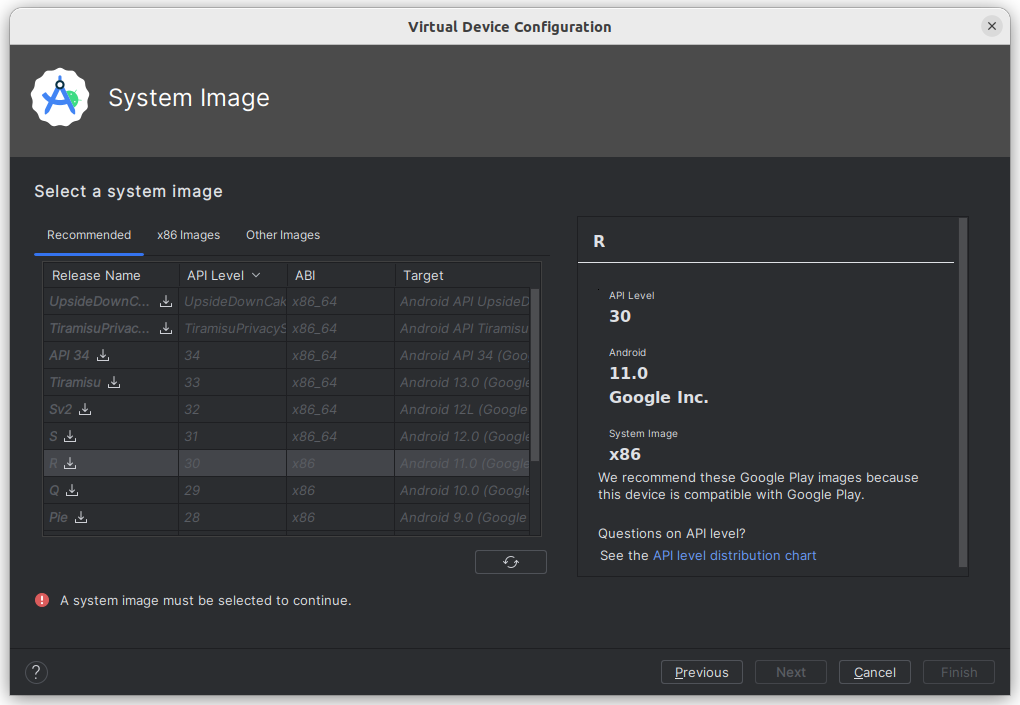
Menambahkan virtual device pada Intellij IDEA:
# - Layout
Layout pada android adalah komponen yang berfungsi untuk mengatur tampilan atau UI. Dimana pada layout kita bisa menata komponen-komponen aplikasi seperti : foto, teks, video, maupun komponen lainnya secara mudah. Layout ditulis dalam format XML.
Ada beberapa jenis layout yang umumnya digunakan oleh developer, diantaranya:
- Linear Layout Setiap komponen atau elemen yang akan digunakan untuk merancang aplikasi android disejajarkan dalam satu arah saja, yaitu secara horizontal atau vertical.
<?xml version="1.0" encoding="utf-8"?>
<LinearLayout xmlns:android="http://schemas.android.com/apk/res/android"
    android:layout_width="match_parent"
    android:layout_height="match_parent"
    android:paddingLeft="16dp"
    android:paddingRight="16dp"
    android:orientation="vertical" >
    <EditText
        android:layout_width="match_parent"
        android:layout_height="wrap_content"
        android:hint="to" />
    <EditText
        android:layout_width="match_parent"
        android:layout_height="wrap_content"
        android:hint="subject" />
    <EditText
        android:layout_width="match_parent"
        android:layout_height="0dp"
        android:layout_weight="1"
        android:gravity="top"
        android:hint="message" />
    <Button
        android:layout_width="100dp"
        android:layout_height="wrap_content"
        android:layout_gravity="right"
        android:text="send" />
</LinearLayout>

- Relative Layout Layout yang bisa dipakai untuk mengatur widget atau komponen aplikasi android secara relative (bebas ), tidak sebatas vertical atau horizontal saja.
<?xml version="1.0" encoding="utf-8"?>
<RelativeLayout xmlns:android="http://schemas.android.com/apk/res/android"
    android:layout_width="match_parent"
    android:layout_height="match_parent"
    android:paddingLeft="16dp"
    android:paddingRight="16dp" >
    <EditText
        android:id="@+id/name"
        android:layout_width="match_parent"
        android:layout_height="wrap_content"
        android:hint="reminder" />
    <Spinner
        android:id="@+id/dates"
        android:layout_width="0dp"
        android:layout_height="wrap_content"
        android:layout_below="@id/name"
        android:layout_alignParentLeft="true"
        android:layout_toLeftOf="@+id/times" />
    <Spinner
        android:id="@id/times"
        android:layout_width="96dp"
        android:layout_height="wrap_content"
        android:layout_below="@id/name"
        android:layout_alignParentRight="true" />
    <Button
        android:layout_width="96dp"
        android:layout_height="wrap_content"
        android:layout_below="@id/times"
        android:layout_alignParentRight="true"
        android:text="done" />
</RelativeLayout>

- Table Layout Untuk merancang layout menggunakan baris dan kolom kita bisa menggunakan Table Layout. Tidak akan ada garis kolom, baris, atau cell yang ditampilkan meskipun namanya adalah table layout.
<TableLayout xmlns:android="http://schemas.android.com/apk/res/android"
    android:layout_width="match_parent"
    android:layout_height="match_parent"
    android:stretchColumns="1">

    <TableRow
        android:background="#22ff">
        <TextView
            android:layout_column="1"
            android:text="Open..."
            android:padding="3dip" />
        <TextView
            android:text="Ctrl-O"
            android:gravity="right"
            android:padding="3dip" />
    </TableRow>

    <TableRow android:background="#22ff">
        <TextView
            android:layout_column="1"
            android:text="Save..."
            android:padding="3dip" />
        <TextView
            android:text="Ctrl-S"
            android:gravity="right"
            android:padding="3dip" />
    </TableRow>

    <TableRow android:background="#22ff">
        <TextView
            android:layout_column="1"
            android:text="Save As..."
            android:padding="3dip" />
        <TextView
            android:text="Ctrl-Shift-S"
            android:gravity="right"
            android:padding="3dip" />
    </TableRow>

    <View
        android:layout_height="2dip"
        android:background="#FF909090" />

    <TableRow android:background="#ffff00">
        <TextView
            android:text="X"
            android:padding="3dip" />
        <TextView
            android:text="Import..."
            android:padding="3dip" />
    </TableRow>

    <TableRow android:background="#ffff00">
        <TextView
            android:text="X"
            android:padding="3dip" />
        <TextView
            android:text="Export..."
            android:padding="3dip" />
        <TextView
            android:text="Ctrl-E"
            android:gravity="right"
            android:padding="3dip" />
    </TableRow>

    <View
        android:layout_height="2dip"
        android:background="#FF909090" />

    <TableRow android:background="#aaf">
        <TextView
            android:layout_column="1"
            android:text="Quit"
            android:padding="3dip" />
    </TableRow>
</TableLayout>

- Frame Layout Layout dengan komponen-komponen yang saling tumpang tindih, misal kita ingin memasukan komponen tombol ke dalam komponen gambar.
<?xml version="1.0" encoding="utf-8"?>
<FrameLayout xmlns:android="http://schemas.android.com/apk/res/android"
    android:layout_width="match_parent"
    android:layout_height="match_parent"
    android:background="#1113">


    <ImageView
        android:layout_width="300dp"
        android:layout_height="300dp"
        android:layout_gravity="center"
        android:background="@color/colorPrimary"

        />

    <Button
        android:layout_width="300px"
        android:layout_height="100px"
        android:layout_gravity="center"
        android:text="Tombol"
        android:background="@color/colorAccent"
        android:textColor="#fff"
        android:textSize="20sp" />
</FrameLayout>

- Constraint Layout Layout yang baru di android studio. Ia merupakan pengembangan dari Linear Layout. Dengan menggunakan constrait layout kita bisa membuat tampilan aplikasi android yang responsive, kompleks, dan powerfull.
<android.support.constraint.ConstraintLayout xmlns:android="http://schemas.android.com/apk/res/android"
    xmlns:app="http://schemas.android.com/apk/res-auto"
    xmlns:tools="http://schemas.android.com/tools"
    android:layout_width="match_parent"
    android:layout_margin="20dp"
    android:layout_height="match_parent"
    tools:context=".MainActivity">


    <TextView
        android:id="@+id/textView"
        android:layout_width="wrap_content"
        android:layout_height="wrap_content"
        android:layout_marginStart="8dp"
        android:layout_marginLeft="8dp"
        android:layout_marginTop="8dp"
        android:layout_marginEnd="8dp"
        android:layout_marginRight="8dp"
        android:layout_marginBottom="8dp"
        android:text="Ini menggunakan constraint layout"
        android:textSize="30sp"
        app:layout_constraintBottom_toBottomOf="parent"
        app:layout_constraintEnd_toEndOf="parent"
        app:layout_constraintStart_toStartOf="parent"
        app:layout_constraintTop_toTopOf="parent" />

    <Button
        android:id="@+id/button"
        android:layout_width="wrap_content"
        android:layout_height="wrap_content"
        android:layout_marginStart="8dp"
        android:layout_marginLeft="8dp"
        android:layout_marginTop="8dp"
        android:layout_marginEnd="8dp"
        android:layout_marginRight="8dp"
        android:layout_marginBottom="8dp"
        android:text="Ini adalah tombol"
        app:layout_constraintBottom_toBottomOf="parent"
        app:layout_constraintEnd_toEndOf="parent"
        app:layout_constraintStart_toStartOf="parent"
        app:layout_constraintTop_toBottomOf="@+id/textView" />
</android.support.constraint.ConstraintLayout>

# - Komponen UI Basic View
"Basic View" yang akan kita kenali yaitu :
- TextView
<TextView
android:id="@+id/myFirstText"
android:layout_width="match_parent"
android:layout_height="wrap_content"
android:layout_marginBottom="30dp"
android:background="#e74c3c"
android:textColor="#ecf0f1"
android:textSize="20sp"
android:text="Hello"/>
- EditText
<EditText
android:id="@+id/myTextField"
android:layout_width="match_parent"
android:layout_height="wrap_content"
android:layout_marginTop="50dp"
android:hint="Tuliskan sesuatu ..."/>
- Button
<Button
android:id="@+id/myButton"
android:layout_width="match_parent"
android:layout_height="wrap_content"
android:layout_marginTop="50dp"
android:background="#2980b9"
android:textColor="#FFFFFF"
android:text="TOMBOL"/>
- ImageButton
<ImageButton
android:id="@+id/myImageButton"
android:layout_width="match_parent"
android:layout_height="wrap_content"
android:src="@mipmap/ic_launcher"/>
- ImageView
<ImageView
android:id="@+id/simpleImageView"
android:layout_width="fill_parent"
android:layout_height="wrap_content"
android:background="#000"
android:src="@drawable/lion"/>
- Checkbox
<CheckBox
android:id="@+id/myFirstCheckbox"
android:layout_width="match_parent"
android:layout_height="wrap_content"
android:text="Autosave"/>
- ToggleButton
<ToggleButton
android:id="@+id/myToggleButton"
android:layout_width="match_parent"
android:layout_height="wrap_content"
android:checked="true"/>
- RadioButton
<RadioButton
android:layout_width="wrap_content"
android:layout_height="wrap_content"
android:text="first"/>
- RadioGroup
<RadioGroup
android:id="@+id/myRadioGroup"
android:layout_width="wrap_content"
android:layout_height="wrap_content">
	<RadioButton
	android:layout_width="wrap_content"
	android:layout_height="wrap_content"
	android:text="first"/>
	<RadioButton
	android:layout_width="wrap_content"
	android:layout_height="wrap_content"
	android:text="second"/>
	<RadioButton
	android:layout_width="wrap_content"
	android:layout_height="wrap_content"
	android:text="third"/>
</RadioGroup>
# - Image Handling
Untuk menampilkan image atau gambar, kamu bisa menggunakan tag ImageView
<ImageView
    id="@+id/home_image"
    android:contentDescription="android logo"
    android:src="@mipmap/ic_launcher"
    android:layout_gravity="center"
    android:layout_width="match_parent"
    android:layout_height="100dp"/>
Untuk menampilkan image dari website atau external url, kamu perlu melakukan beberapa langkah diantaranya:
- menambahkan izin untuk mengakses internet
- menambahkan dependency picasso
- menambahkan logic untuk menampilkan gambar dari external url
Tambahkan izin untuk mengakses iternet pada AndroidManifest.xml:
<uses-permission android:name="android.permission.INTERNET"/>
Tambahkan dependency Picasso pada build.gradle:
implementation 'com.squareup.picasso:picasso:latest.release'
Tambahkan logic untuk menampilkan gambar pada MainActivity:
ImageView imageView = findViewById(R.id.home_image);
String uri = "https://source.android.com/static/docs/setup/images/Android_symbol_green_RGB.png";

Picasso.get()
       .load(uri)
       .resize(500, 500)
       .centerCrop()
       .into(imageView);
# - Activity
Activity (aktivitas) adalah sebuah komponen aplikasi yang menyediakan layar yang digunakan pengguna untuk berinteraksi guna melakukan sesuatu, misalnya memilih nomor ponsel, mengambil foto, mengirim email, atau menampilkan peta.
Activity adalah komponen yang dapat dilihat oleh pengguna, sehingga mereka dapat berinteraksi dengan aplikasi.
# - Siklus Hidup Activity
Siklus hidup aplikasi Android diatur oleh sistem, berdasarkan kebutuhan pengguna, sumber daya yang tersedia, dan sebagainya.
| No | Method | Keterangan |
|---|---|---|
| 1 | onCreate() | Method ini dipanggil saat activity pertama kali dibuat |
| 2 | onStart() | Method ini dipanggil saat sebuah activity tampil ke pengguna |
| 3 | onFreeze() | Method ini dipanggil ketika activity berada dalam keadaan freeze (tidak merespon) akibat sedang sibuk mengerjakan tugas tertentu pada sistem |
| 4 | onPause() | Method ini dipanggil ketika activity di hentikan sementara (pause) dan berikutnya ketika dijalankan kembali akan berada dalam posisi resume dan memanggil method OnResume() |
| 5 | onStop() | Method ini dipanggil ketika activity tidak lagi tampak kepada pengguna |
| 6 | onRestart() | Method ini dipanggil ketika acitivity dijalankan kembali setelah state Stop |
| 7 | onDestroy() | Method ini dipanggil sebelum activity dihancurkan (destroy) oleh sistem (baik secara manual maupun untuk kepentingan pelonggaran memori. |
# - Integrasi Activity dengan Layout
Java pada project Android berfungsi untuk menangani logic dan menampilkannya ke dalam layout.
package com.example.myapplication;

import android.os.Handler;
import android.os.Looper;
import android.view.View;
import android.widget.Button;
import android.widget.TextView;
import androidx.appcompat.app.AppCompatActivity;
import android.os.Bundle;

public class MainActivity extends AppCompatActivity {

    @Override
    protected void onCreate(Bundle savedInstanceState) {
        super.onCreate(savedInstanceState);
        setContentView(R.layout.activity_main);

        TextView textView = findViewById(R.id.text_home);
        Button button = findViewById(R.id.button_home);
        button.setOnClickListener(view -> {
            textView.setVisibility(View.VISIBLE);
            Handler handler = new Handler(Looper.getMainLooper());
            handler.postDelayed(() -> textView.setVisibility(View.GONE), 3000);
        });
    }
}
Untuk membuat activity kamu bisa klik kanan pada foder project, kemudian pilih New > Activity > pilih Empty Views Activity, berikut ini contoh pembuatan activity dengan nama ProductActivity:
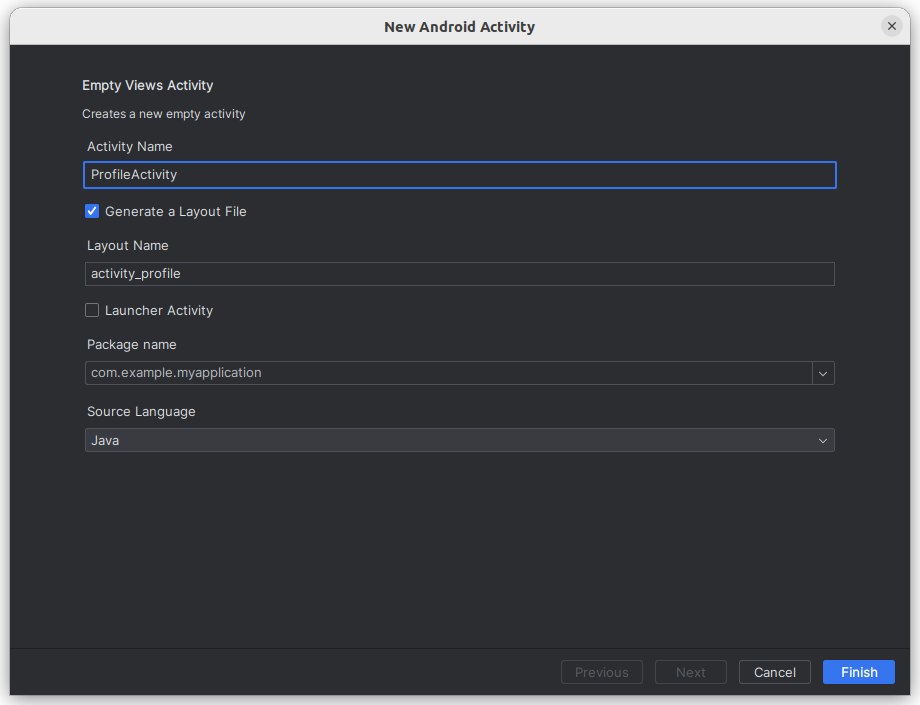
Maka secara otomatis Intellij IDEA akan membuatkan 1 file yaitu layout/activity_product.xml dan ProductActivity.java
Contoh file layout/activity_product.xml yang sudah di generate, kamu bisa memodifikasinya sesuai kebutuhan:
<?xml version="1.0" encoding="utf-8"?>
<androidx.appcompat.widget.LinearLayoutCompat
        xmlns:android="http://schemas.android.com/apk/res/android"
        xmlns:tools="http://schemas.android.com/tools"
        xmlns:app="http://schemas.android.com/apk/res-auto"
        android:layout_width="match_parent"
        android:layout_height="match_parent"
        android:orientation="vertical"
        tools:context=".ProductActivity">
    <TextView
            android:id="@+id/product_text"
            android:text="Empty products"
            android:gravity="center"
            android:textSize="21sp"
            android:layout_marginTop="20dp"
            android:layout_width="match_parent"
            android:layout_height="wrap_content"/>

</androidx.appcompat.widget.LinearLayoutCompat>
Contoh ProductActivity.java yang sudah di generate:
// ProductActivity.java
package com.example.myapplication;

import androidx.appcompat.app.AppCompatActivity;
import android.os.Bundle;

public class ProductActivity extends AppCompatActivity {

    @Override
    protected void onCreate(Bundle savedInstanceState) {
        super.onCreate(savedInstanceState);
        setContentView(R.layout.activity_product);
    }
}
# - Perpindahan Activity
Untuk melakukan perpindahan dari satu activity ke activity lain kamu bisa menggunakan method startActivity() dengan parameter class Intent yang sudah diarahkan ke activity tujuan. Berikut ini contoh perpindahan dari MainActivity ke ProductActivity:
// MainActivity
button.setOnClickListener(view -> {
    ...
    Intent intent = new Intent(MainActivity.this, ProductActivity.class);
    startActivity(intent);
});
# - HTTP Client
Android merupakan platform yang berjalan di perangkat pengguna, dengan kata lain sama seperti client side. Untuk menampilkan data dari server secara dinamis, android membutuhkan HTTP Client library. Salah satu library yang dapat digunakan sebagai HTTP Client pada android adalah Retrofit.
Berikut ini adalah link official dari Retrofit:
square.github.io/retrofit
Tambahkan dependency pada build.gradle:
implementation 'com.squareup.retrofit2:converter-gson:latest.release'
implementation 'com.squareup.retrofit2:retrofit:latest.release'
Kali ini kamu dapat mencoba menggunakan dummy API untuk menampilkan data sebagai simulasi menggunakan dummy json pada link berikut:
dummyjson.com/products
Buatlah sebuah layout dengan nama product_item.xml:
<!-- product_item.xml -->
<?xml version="1.0" encoding="utf-8"?>
<androidx.appcompat.widget.LinearLayoutCompat
        xmlns:android="http://schemas.android.com/apk/res/android"
        android:clickable="true"
        android:focusable="true"
        android:paddingHorizontal="8dp"
        android:paddingVertical="4dp"
        android:foreground="?attr/selectableItemBackground"
        android:orientation="horizontal"
        android:layout_width="match_parent"
        android:layout_height="wrap_content">
    <ImageView
            android:id="@+id/product_image"
            android:src="@mipmap/ic_launcher"
            android:scaleType="centerCrop"
            android:contentDescription="product image"
            android:padding="8dp"
            android:layout_width="100dp"
            android:layout_height="100dp"/>
    <LinearLayout
            android:orientation="vertical"
            android:layout_width="wrap_content"
            android:layout_height="wrap_content">
        <TextView
                android:id="@+id/product_title"
                android:text="Product title"
                android:paddingHorizontal="8dp"
                android:paddingVertical="4dp"
                android:textStyle="bold"
                android:textSize="18sp"
                android:ellipsize="end"
                android:maxLines="2"
                android:layout_width="match_parent"
                android:layout_height="wrap_content"/>
        <TextView
                android:id="@+id/product_description"
                android:text="Product description"
                android:paddingHorizontal="8dp"
                android:paddingVertical="4dp"
                android:textSize="12sp"
                android:ellipsize="end"
                android:maxLines="2"
                android:layout_width="match_parent"
                android:layout_height="wrap_content"/>
    </LinearLayout>
</androidx.appcompat.widget.LinearLayoutCompat>
Kemudian buatlah package baru dengan nama model dan buat 2 class untuk menampung data dari API yaitu:
ProductWrapperProduct
Contoh ProductWrapper.java:
package com.example.myapplication.model;

import java.util.List;

public class ProductWrapper {

    List<Product> products;

    public List<Product> getProducts() {
        return products;
    }

    public void setProducts(List<Product> products) {
        this.products = products;
    }
}
Contoh Product.java:
package com.example.myapplication.model;

public class Product {

    Long id;

    String title;

    String description;

    String thumbnail;

    // setter getter ...
}
Buatlah 1 package baru dengan nama api kemudian buat satu interface dengan nama ProductApi pada package api:
package com.example.myapplication.api;

import com.example.myapplication.model.ProductWrapper;
import retrofit2.Call;
import retrofit2.http.GET;

public interface ProductApi {

    @GET("products")
    Call<ProductWrapper> getProducts();
}
Buatlah 1 package dengan nama adapter kemudian buat satu class dengan nama ProductListAdapter dan extends class RecyclerView.Adapter<T>:
package com.example.myapplication.adapter;

// import ...

public class ProductListAdapter extends RecyclerView.Adapter<ProductListAdapter.Item> {
    List<Product> products;
    public ProductListAdapter(List<Product> products) {
        this.products = products;
    }

    @NonNull
    @NotNull
    @Override
    public ProductListAdapter.Item onCreateViewHolder(@NonNull @NotNull ViewGroup parent, int viewType) {
        View root = LayoutInflater.from(parent.getContext())
                .inflate(R.layout.product_item, parent, false);
        return new Item(root);
    }

    @Override
    public void onBindViewHolder(@NonNull @NotNull ProductListAdapter.Item holder, int position) {
        holder.setData(products.get(position));
    }

    @Override
    public int getItemCount() {
        return products.size();
    }

    public static class Item extends RecyclerView.ViewHolder {
        public Item(@NonNull @NotNull View itemView) {
            super(itemView);
        }

        public void setData(Product product) {
            ImageView image = itemView.findViewById(R.id.product_image);
            TextView title = itemView.findViewById(R.id.product_title);
            TextView description = itemView.findViewById(R.id.product_description);

            Picasso.get()
                    .load(product.getThumbnail())
                    .resize(500, 500)
                    .centerCrop()
                    .placeholder(R.mipmap.ic_launcher)
                    .into(image);

            title.setText(product.getTitle());
            description.setText(product.getDescription());
        }
    }
}
Implementasikan retrofit pada ProductActivity:
// ...
public class ProductActivity extends AppCompatActivity {

    final List<Product> products = new ArrayList<>();

    RecyclerView productRecycler;

    ProductListAdapter productAdapter;

    @Override
    protected void onCreate(Bundle savedInstanceState) {
        // ...

        Retrofit retrofit = new Retrofit.Builder()
                .baseUrl("https://dummyjson.com")
                .addConverterFactory(GsonConverterFactory.create())
                .build();

        ProductApi api = retrofit.create(ProductApi.class);

        api.getProducts().enqueue(new Callback<ProductWrapper>() {
            @Override
            public void onResponse(@NotNull Call<ProductWrapper> call, @NotNull Response<ProductWrapper> response) {
                ProductWrapper result = response.body();
                if (result != null) {
                    products.clear();
                    products.addAll(result.getProducts());
                    String jsonData = new Gson().toJson(result);
                    Log.d("products", "onResponse: " + jsonData);
                    productAdapter.notifyItemRangeChanged(0, products.size());
                }
            }

            @Override
            public void onFailure(@NotNull Call<ProductWrapper> call, @NotNull Throwable t) {
                Log.e("products", "onFailure: " + t.getMessage());
            }
        });

        productAdapter = new ProductListAdapter(products);
        productRecycler = findViewById(R.id.product_recycler);
        productRecycler.setAdapter(productAdapter);
        productRecycler.setLayoutManager(new LinearLayoutManager(this, LinearLayoutManager.VERTICAL, false));
    }
}
# - Melakukan build project
./gradlew assembleRelease